We’re pleased to announce that version 4.4.32 of our extension introduces convenient keyboard shortcuts for your most-used features.
Default Shortcuts
| Function | Shortcuts |
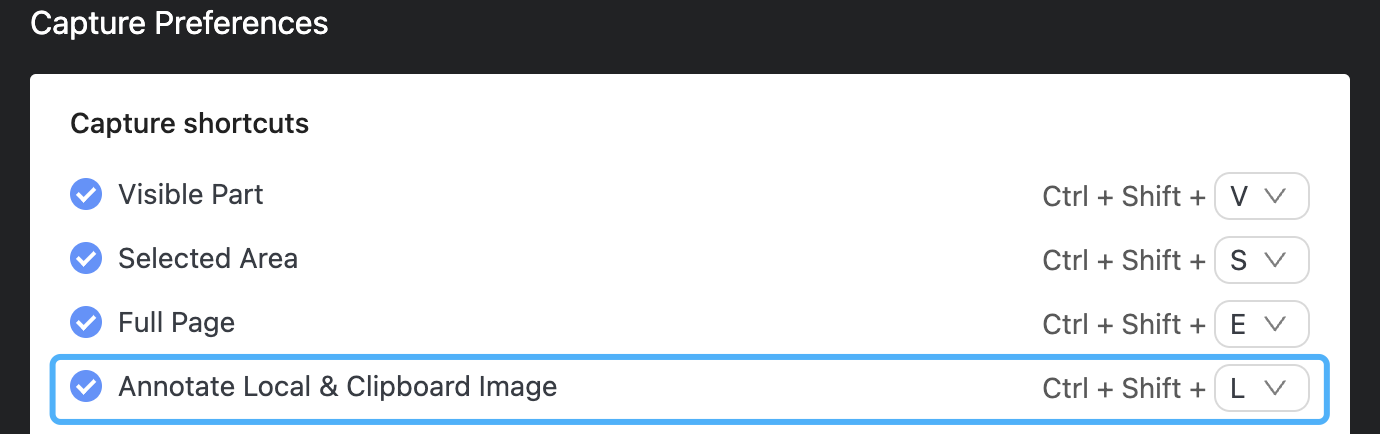
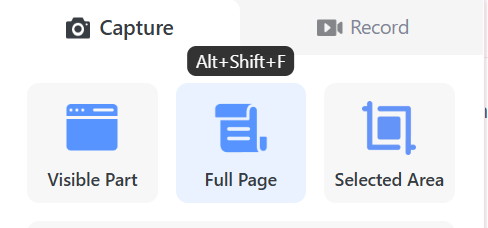
| Capture > Visible Part | Alt+Shift+V |
| Capture > Full Page | Alt+Shift+F |
| Capture > Selected Area | Alt+Shift+S |
| Start Recording Desktop | Alt+Shift+R |
If a default shortcut combination doesn’t appear when hovering over an option in our extension’s pop-up menu, it likely conflicts with another extension or application. Please refer to the ‘Managing Conflicts’ section below to resolve this issue.
🎉Customizing Shortcuts
You can customize these shortcuts in two ways:
1. Through the extension’s Options menu.

Click “Set shortcuts” in Options.

2. Directly open your browser’s shortcuts page:
1) Chrome URL: chrome://extensions/shortcuts
2) Edge URL: edge://extensions/shortcuts
Available Functions for Custom Shortcuts
| Function | Default |
| Activate the extension | Not set |
| Capture > Visible Part | Alt+Shift+V |
| Capture > Full Page | Alt+Shift+F |
| Capture > Selected Area | Alt+Shift+S |
| Record > Desktop | Alt+Shift+R |
| Record > This Tab | Not set |
| Record > Camera Only | Not set |
| Record > Custom (This Tab) | Not set |
| Pause/Resume recording | Not set |
| Stop recording | Not set |
| Annotate Local & Clipboard Image | Not set |
🎉Benefits:
1. You can boost your productivity with custom 2-key shortcuts like Alt+R. Easily customize or change any default shortcuts to suit your preferences.
2. Record or capture any desired content in just one step. For example, you can easily record courses, movies, songs, or computer games using our ‘Record > This Tab’ feature. Previously, you had to click our extension first, select Record, choose This Tab, and click Start Recording. Now, simply use keyboard shortcuts like Alt+T or Alt+Shift+T to instantly start recording with a single action.
3. No need to use the previous shortcut to activate our extension first—you can now capture or record directly in your desired mode.
4. By default, the shortcuts are effective only in the browser. To let the shortcuts work outside the browser, select “Global” from the dropdown menu. For example, if you are using another browser or using a desktop app, you can still initiate, pause, and stop a recording using the shortcuts even though you are not using that browser.

If you previously used shortcuts such as Ctrl+Shift+S or Ctrl+Shift+E, you can restore your preferred combinations on the browser’s shortcuts page. If you cannot restore or change the shortcut, it’s likely already assigned to another extension in your profile. You’ll need to either modify that existing shortcut or choose a different combination for our extension. If you can set the shortcut, but it doesn’t work, please refer to the ‘Managing Conflicts’ section below.
Managing Conflicts
1. When the same shortcut is set as Global in another browser profile or a desktop app, the commands in that profile or app will take priority, causing the shortcut to appear non-functional in your current profile. To avoid conflicts, you can change the shortcut in your current profile, another browser profile, or the desktop app.
2. If shortcuts don’t automatically sync across different computers, even when using the same browser profile, you’ll need to manually set them on the new device or profile.
You may click here to check out the details.
3. If you want to record without opening a browser, but the Global mode shortcuts aren’t working, you can utilize the AwesomeScreenshot Desktop App for Windows or Mac and configure shortcuts within the app. Desktop app shortcuts take priority and aren’t limited by browser restrictions.